Building a toad house is one of the most rewarding wildlife projects you can undertake. These remarkable amphibians are true garden allies, consuming thousands of slugs, snails, and insects each year. In Devon’s mild, damp climate, toads thrive when provided with suitable shelter. A well-built toad house offers protection from predators, extreme weather, and provides the cool, moist environment these creatures need to flourish.

Why Build a Toad House?
Toads are incredible natural pest controllers – a single toad can eat up to 3,000 insects in one season! They’re particularly effective against slugs and snails that damage flowers and vegetables. However, modern garden practices often remove the natural hiding places toads need. Your toad house provides essential shelter for hibernation, daily rest, and protection from the hot sun that can quickly dehydrate these moisture-loving creatures.
Understanding Toad Behavior
Toads are largely nocturnal, emerging at dusk to hunt for food. During the day, they seek cool, damp, dark places to rest. They hibernate from October to March in Devon, requiring frost-free shelter. Understanding these habits helps us design the perfect toad house that meets their specific needs throughout the year.

Materials You’ll Need
Natural Stone Method
- Flat stones: Various sizes for walls and roof
- Smaller stones: For filling gaps
- Moss or soil: For chinking and insulation
- Large flat capstone: For the roof
Clay Pot Method
- Large terracotta pot: 20-30cm diameter
- Stones or bricks: For raising and creating entrance
- Hammer: For creating entrance hole
- Sandpaper: For smoothing rough edges
Wooden Method
- Untreated wood planks: Cedar or oak preferred
- Wood screws: Stainless steel, rust-resistant
- Drill and bits: For drainage holes
- Natural wood stain: Optional, for weather protection
Method 1: Natural Stone Toad House
Step 1: Choose Your Location
Select a spot that remains cool and damp throughout the day. Ideal locations include:
- Under large plants or shrubs
- North-facing areas with partial shade
- Near water sources but not in flood-prone areas
- Away from foot traffic but accessible for maintenance

Step 2: Prepare the Foundation
Clear a small area about 30cm square, removing any grass or weeds. Create a slight depression in the soil – this helps retain moisture and provides a cool base. The foundation should be level but with gentle drainage to prevent waterlogging.
Step 3: Build the Walls
Start with your largest, flattest stones as the base. Build up the walls using a dry stone technique, leaving a 8-10cm entrance gap. The interior should be roughly 15-20cm wide – large enough for a toad to turn around comfortably. Maintain walls about 10-15cm high.
Step 4: Create the Roof
Place your largest, flattest stone across the top, ensuring it overhangs the entrance to provide weather protection. The roof should be secure but removable for occasional cleaning. Leave small gaps for ventilation but ensure the interior remains dark.

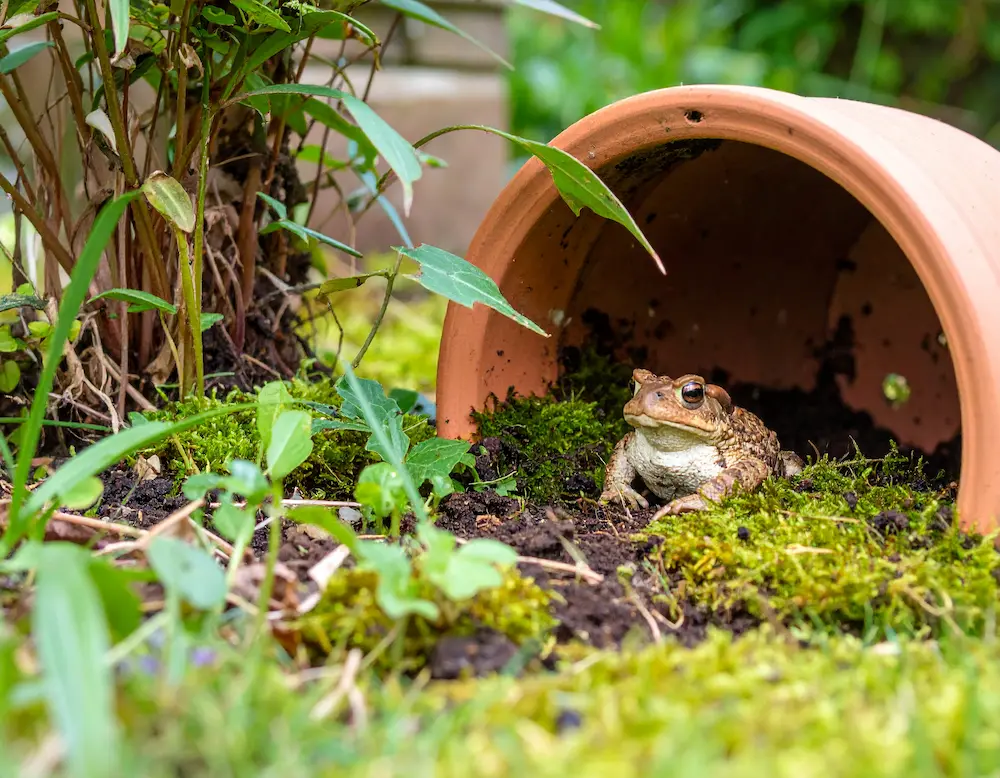
Method 2: Clay Pot Toad House
Step 1: Prepare the Pot
Turn a large terracotta pot upside down. Using a hammer and chisel, carefully create an entrance hole about 7-8cm wide at the rim. Sand any rough edges smooth to prevent injury to visiting toads.
Step 2: Create the Base
Dig a shallow depression and place the pot upside down. Prop up one side slightly using stones or bricks to create the entrance. This also ensures good drainage and prevents the pot from sitting in water.
Step 3: Camouflage and Insulate
Surround the pot with soil, stones, and moss to make it look natural. This also provides insulation and helps maintain the cool, moist environment toads prefer.

Method 3: Wooden Toad House
Step 1: Design and Cut
Create a simple box design approximately 20cm x 15cm x 12cm high. Cut an entrance hole 8cm wide in the front panel. Drill several small drainage holes in the base to prevent waterlogging.
Step 2: Assembly
Assemble using stainless steel screws to prevent rust. Ensure all joints are tight but consider adding ventilation gaps near the roof. The entrance should be at ground level when installed.
Step 3: Weatherproofing
Apply a natural, non-toxic wood stain if desired, though untreated wood will weather naturally and may be preferred by wildlife. Position the house so rain doesn’t directly enter the entrance.

Installation and Placement
Perfect Locations
- Flower borders: Among perennials that provide overhead cover
- Vegetable gardens: Near areas with slug and snail problems
- Pond edges: Close to water but above flood levels
- Compost areas: Where insects are abundant
Avoiding Common Mistakes
- Don’t place in full sun – toads need cool conditions
- Avoid areas that flood or become waterlogged
- Keep away from areas treated with pesticides
- Don’t make the entrance too large – it should exclude larger predators
Maintenance and Seasonal Care
Spring Preparation
- Check for winter damage and repair as needed
- Clear any debris from the entrance
- Add fresh moss or leaf litter to maintain moisture
- Check that drainage is working properly
Summer Monitoring
- Ensure the interior remains cool and moist
- Water the surrounding area during dry spells
- Check for signs of occupation (worn paths, droppings)
- Maintain vegetation cover around the house
Autumn Setup
- Add extra insulation with leaves or moss
- Ensure the structure is secure for winter storms
- Check all drainage to prevent ice damage
- Reduce disturbance as toads prepare for hibernation

Signs of Success
Indicators Your Toad House is Working
- Worn paths: Leading to and from the entrance
- Droppings: Small, dark pellets near the entrance
- Disturbed interior: Slight hollows where toads have rested
- Reduced pest problems: Fewer slugs and snails in the area
What to Expect by Season
- Spring: Toads emerge from hibernation, may use house for daily shelter
- Summer: Regular nightly visitors, especially during humid weather
- Autumn: Increased activity as toads prepare for winter
- Winter: Hibernation site for one or more toads
Supporting Your Garden Toads
Creating Toad-Friendly Environments
- Water sources: Shallow dishes or small ponds for drinking
- Native plants: Provide insects and shelter
- Compost heaps: Attract insects and provide additional shelter
- Log piles: Create corridors between habitats
Avoiding Harmful Practices
- No pesticides: These can poison toads and their food sources
- Careful gardening: Check for toads before moving stones or wood
- Pet safety: Keep cats indoors during dawn and dusk hours
- Light pollution: Minimize bright lights that can disrupt hunting
Multiple Toad Houses
Consider building several toad houses throughout your garden. Toads are territorial and having multiple options increases the chances of occupation. Different styles and locations also provide backup shelter if one becomes unsuitable.

Benefits to Your Garden
Your toad house investment will pay dividends through:
- Natural pest control: Dramatic reduction in slug and snail damage
- Reduced chemical use: Less need for harmful pesticides
- Biodiversity: Supporting native wildlife populations
- Education: Wonderful way to observe and learn about amphibians
- Satisfaction: The joy of providing habitat for these beneficial creatures
Creating a toad house is a simple yet impactful way to support Devon’s native wildlife while protecting your precious plants. These remarkable amphibians have been garden allies for centuries, and with suitable shelter, they’ll continue their valuable work for years to come.
For more wildlife habitat projects and native plant guides, explore our other conservation resources.